For a few years now I have been using a Netgear ReadyNAS as a NAS, and a time machine backup. The Netgear had a native time machine server inbuilt into the device which was super handy as I never had to think about backups! It just worked!
Sadly a few weeks ago, it gave up the ghost, and my laptop has been complaining that it needs a backup ever since.
I introduce to you….
The poor man’s network Time Machine.
By using a linux OS, and a clever piece of software called Netatalk we can setup a Time machine destination!
It’ super easy, and I had the whole thing up and running in about 30 min.
Step 1 – Install Ubuntu or any other main linux distro into a VM (onto bare metal, or whatever, i’m not your mother)
Making sure you provision enough space for your backups. In my case, I set aside roughly 900GB.
Rule of thumb is to set aside about double your current capacity to allow for a history of files with enough depth.
Step 2 – Update the server using sudo apt-get update && sudo apt-get upgrade
Step 3 – Create a static IP for the host
sudo nano /etc/network/interfaces

####

# The primary network interface
auto eth0
iface eth0 inet static
address 192.168.0.107
netmask 255.255.255.0
gateway 192.168.0.100
dns-nameservers 192.168.0.101 192.168.0.100
CTRL – O, ENTER, CTRL – X
Reboot.
Step 4 – Install the software we really need:
sudo apt-get install netatalk avahi-daemonStep 5 – Create a directory to store the time machine backup
cd /home/<USER ACCOUNT>/
Step 6 – Then create a directory called time machine:
mkdir -R timemachine
Step 7 – Now to change permissions to own the folder:
sudo chown -R <YOUR USER> timemachine/
Step 8 – Open up the config file for Netatalk:
sudo nano /etc/netatalk/AppleVolumes.defaultStep 9 – And add the following line to that file, this adds default settings for all shares.
:DEFAULT: options:upriv,usedotsStep 10 – Next line down, add the folder that we just created!
/home/<YOUR USER>/timemachine “Time Machine” options:tm volsizelimit:850000 allow:<YOUR USER>
As you can see, the share size is set to about 850GB, and we need to change 2 variables make sure you use the user account that you setup on the server.
Step 11 – Restart the netatalk service
sudo service netatalk restart
Step 12 – You are almost there! Head to your Macintosh and open System Preferences. (Apple Logo –> System Preferences)
Select Time Machine.
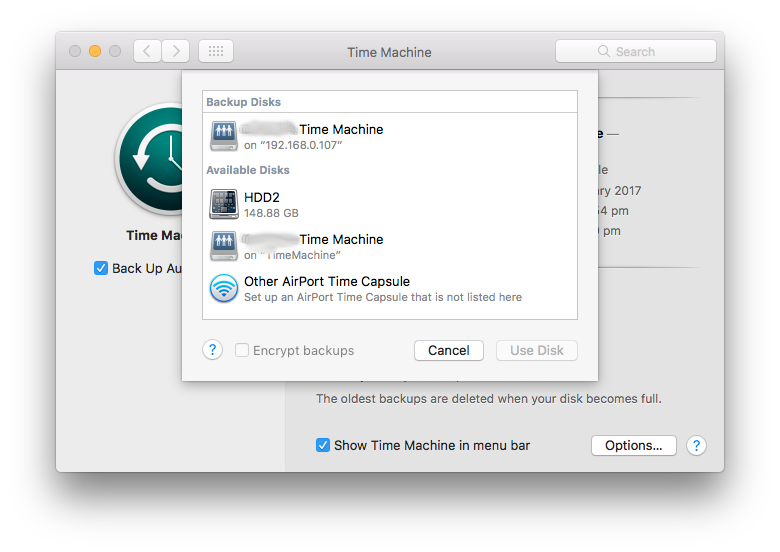
Now you are on the main option page for Time Machine, click Select Disk and you should see your share available! If not, Hold down the Apple Key –> K and add the following to the ‘Server Address Box’ afp://<YOUR SERVER IP>
It should look like the following:
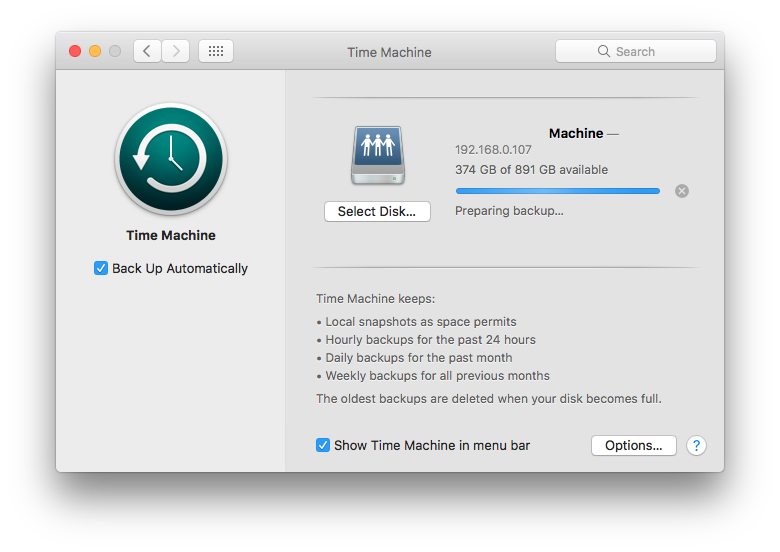
By this point, you should be giggling!
So easy, and its set and forget!
I must admit, the following page is what massively helped me, a shout out to Dae!
http://dae.me/blog/1660/concisest-guide-to-setting-up-time-machine-server-on-ubuntu-server-12-04/
Doc Brown would be proud……….