
You might have setup Collectd to go and fetch metrics from your PFSense box, but did you know you can install Telegraf directly onto your PFSense machine?
It has also been confirmed that Telegraf is coming as a supported package one day!
Until then, its super easy to install it onto your PFSense Router.
Here is how I did it!
Step 1 – Head over to this website and locate the most up to date version of Telegraf
http://pkg.freebsd.org/freebsd:10:x86:64/latest/All/
At time of writing, you required the following link:
http://pkg.freebsd.org/freebsd:10:x86:64/latest/All/telegraf-1.1.2.txz
Step 2 – Now SSH into your PFSense Router,
If you have not enabled SSH access, no fear, login to the web console click on the System menu –> Advanced. Near the bottom you will see the following:
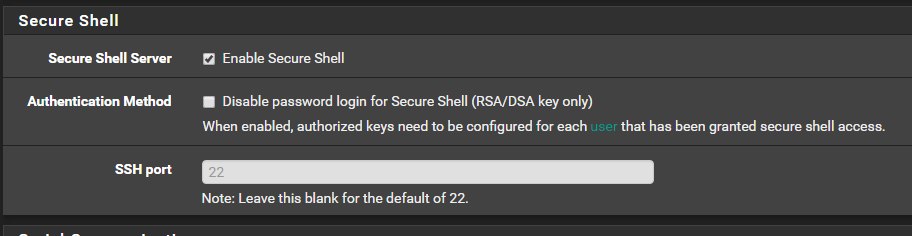
Select ‘Enable Secure Shell’ and click Save at the bottom.
Connect up via SSH using PuTTY and drop into the Shell by pressing ‘8’
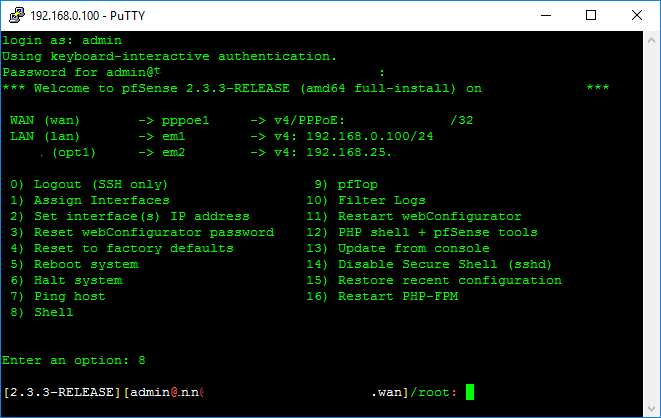
Run the following command to install:
pkg add \
http://pkg.freebsd.org/freebsd:10:x86:64/latest/All/telegraf-1.1.2.txz
Step 3 – Sadly Nano isn’t installed by default, and Vi is faaar too complicated (one day I will figure it out).
So I fired up WinSCP and navigated to the following file to change the configuration to point to my InfluxDB Server.
/usr/local/etc/telegraf.conf
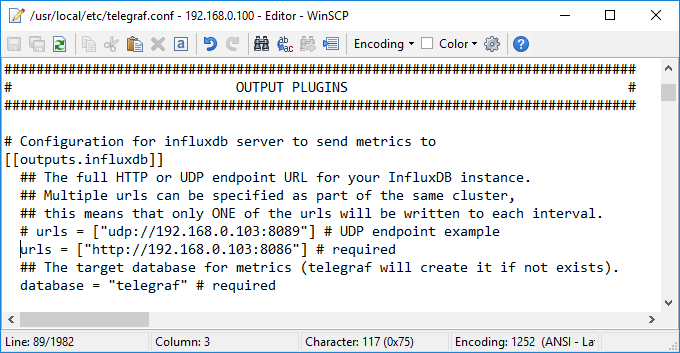
Change urls = to your Server IP address, like show in the image above.
Change database= to your database in Influx DB
If you need, or want to create a separate database, go to your servers IP:8083 and setup a database first.
For simplicity, I currently have:
Collectd – SNMP Metrics
Telegraf – Telegraf instance Metrics
Speedtest – Speedtest script Metrics
Step 4 – Start Telegraf!
From your SSH window, type:
cd /usr/local/etc/rc.d
./telegraf start
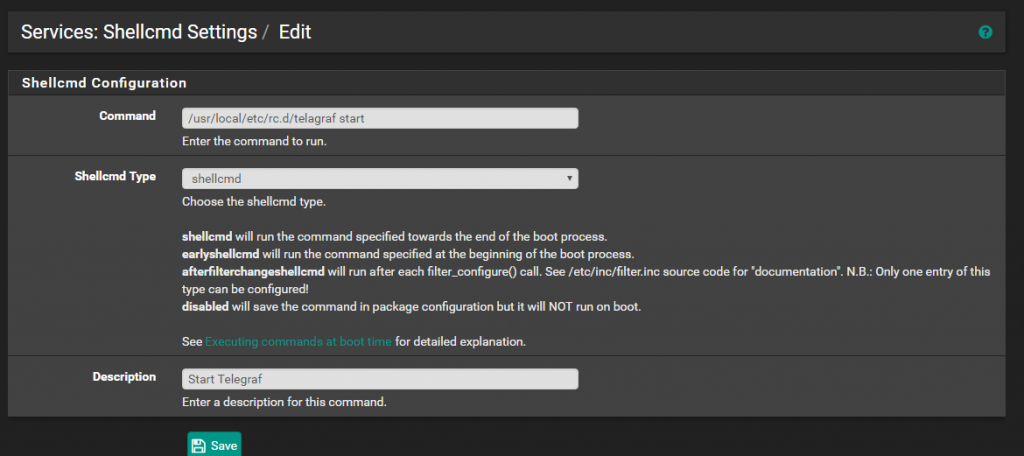
Step 5 – Only thing missing now is making it start at boot time.
This command, does not work on 2.3.3,
echo 'telegraf_enable=YES' >> /etc/rc.confSo instead, I installed the package ‘shellcmd’ from the package manager (System –> Package Manager).
Then Navigate to the menu, Services –> Shellcmd, will then allow you to setup the start trigger for Telegraf like the following:
/usr/local/etc/rc.d/telegraf start
All done!
Start graf’ing!
I cant take all the credit here, this guide helped massively!
https://sbaronda.com/2016/06/14/logging-pfsense-metrics-to-influxdb/